Integrations
Jira Integration
BillulloNex Agentic System integrates with Jira to streamline your project management and issue tracking. By connecting your Jira workspace, you can use natural language to create issues, check statuses, and manage your development workflows directly from the chat interface.
Installation & Setup
Connecting BillulloNex to Jira is straightforward. Follow these steps to get started.
Step 1: Login to BillulloNex
Navigate to the application and ensure you are logged in to your account.
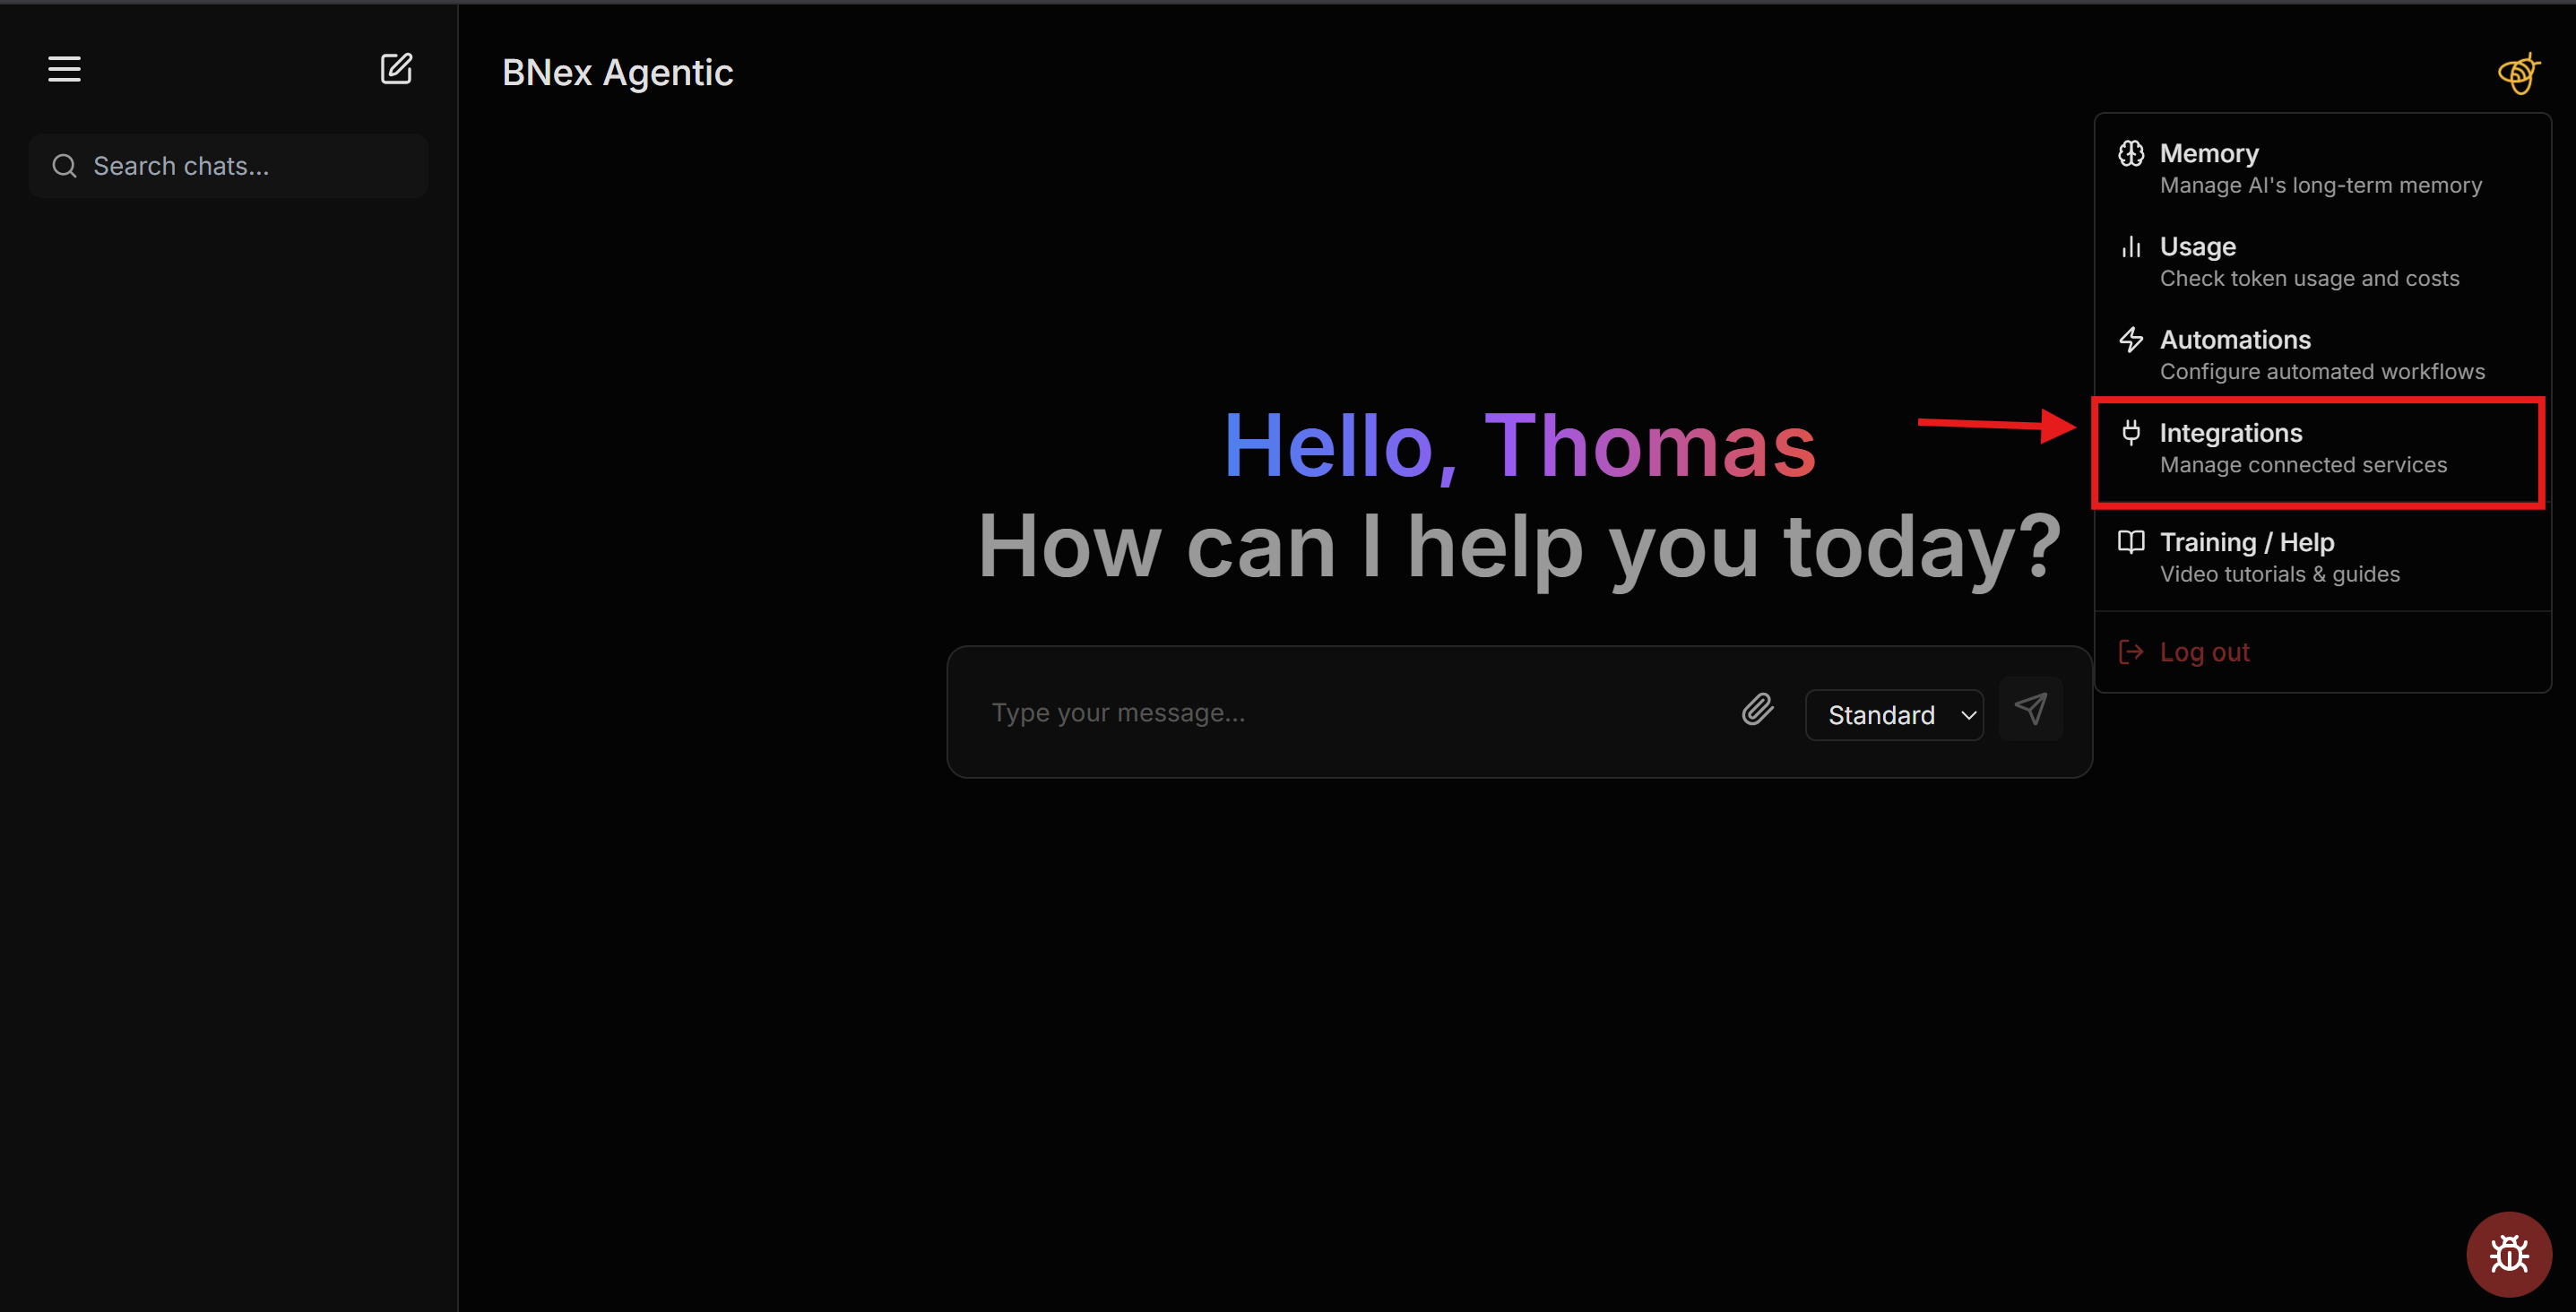
Step 2: Access Integrations
Click on your user avatar in the top right corner and select "Integrations" from the dropdown menu to view available connections.
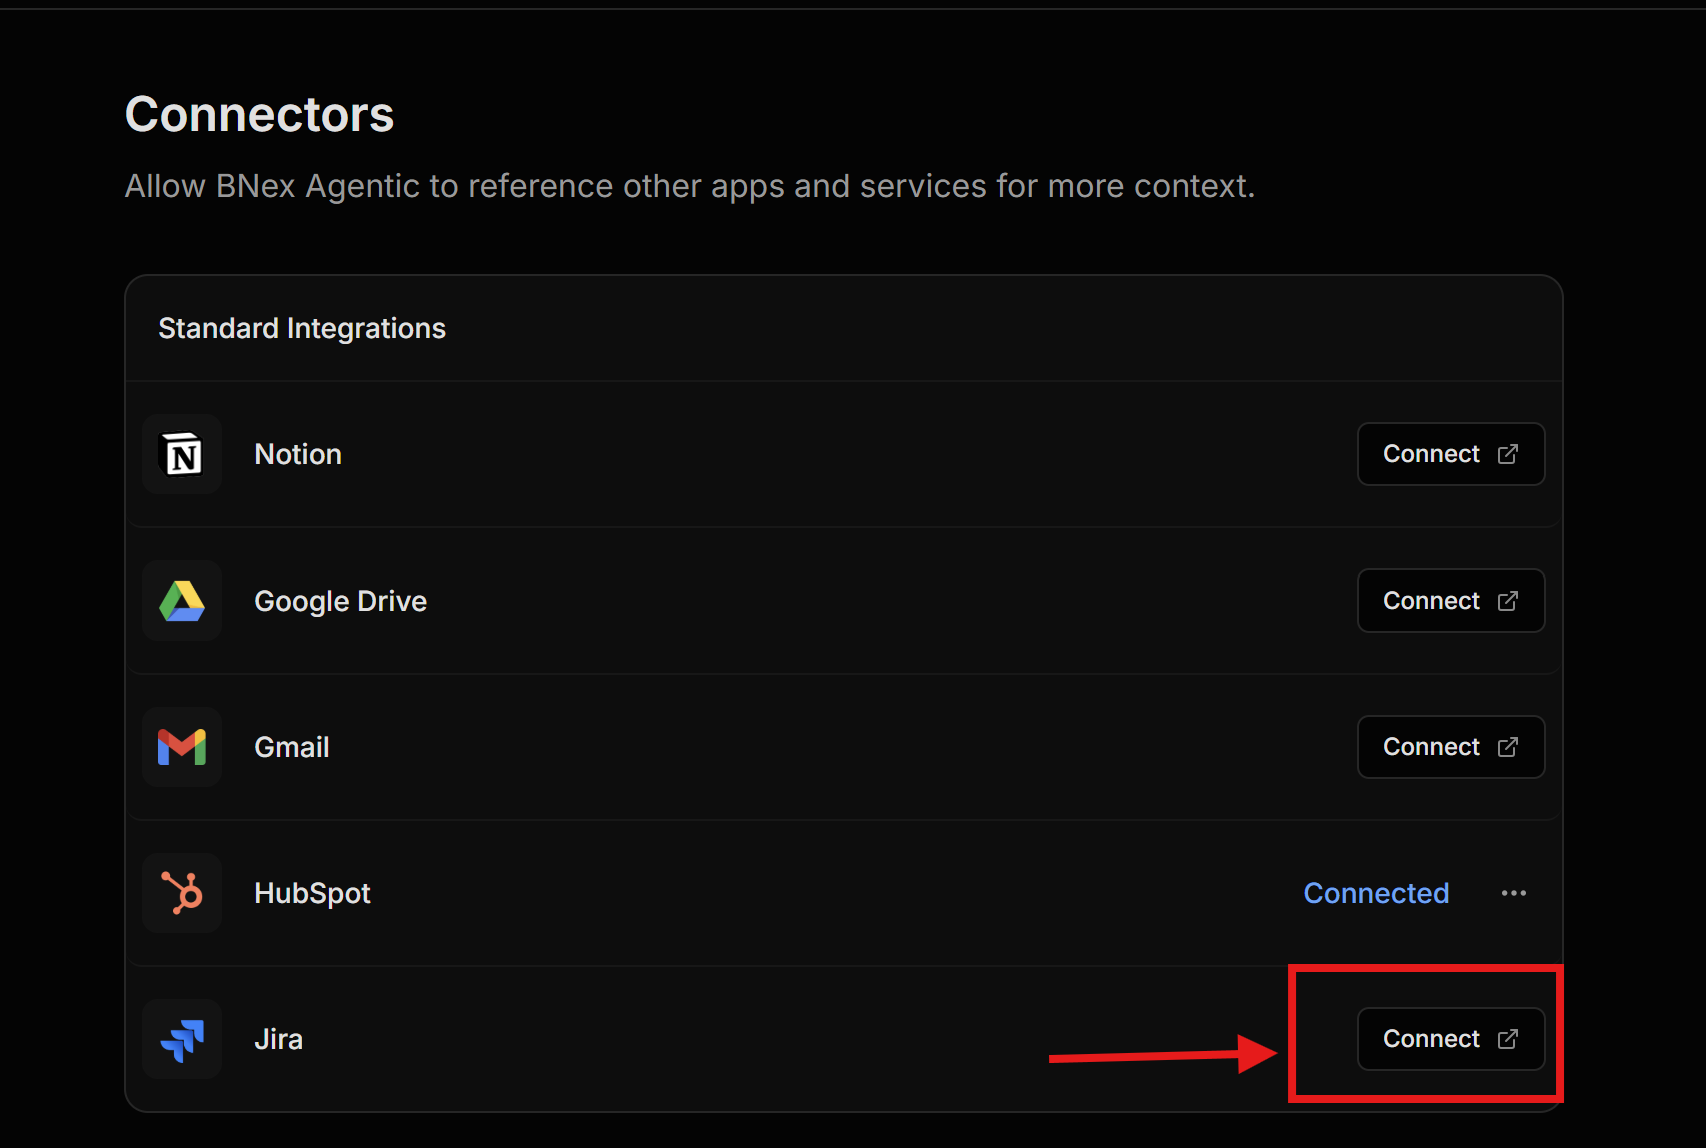
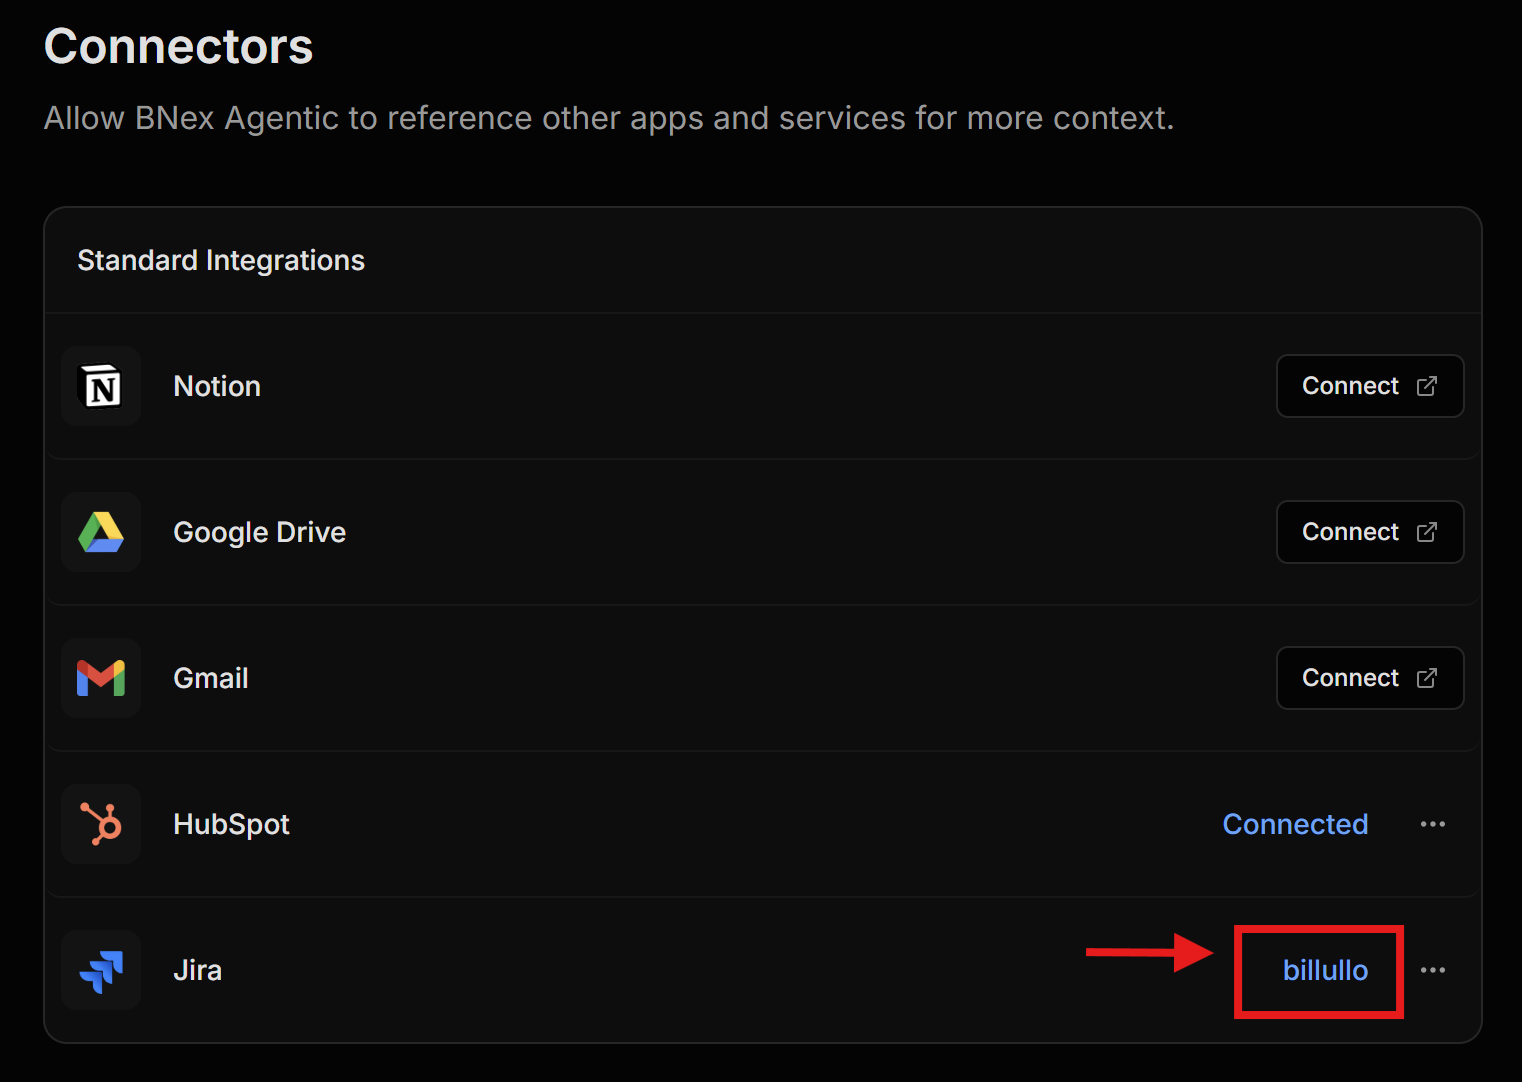
Step 3: Connect Jira
Locate the Jira card in the list of integrations and click the "Connect" button.
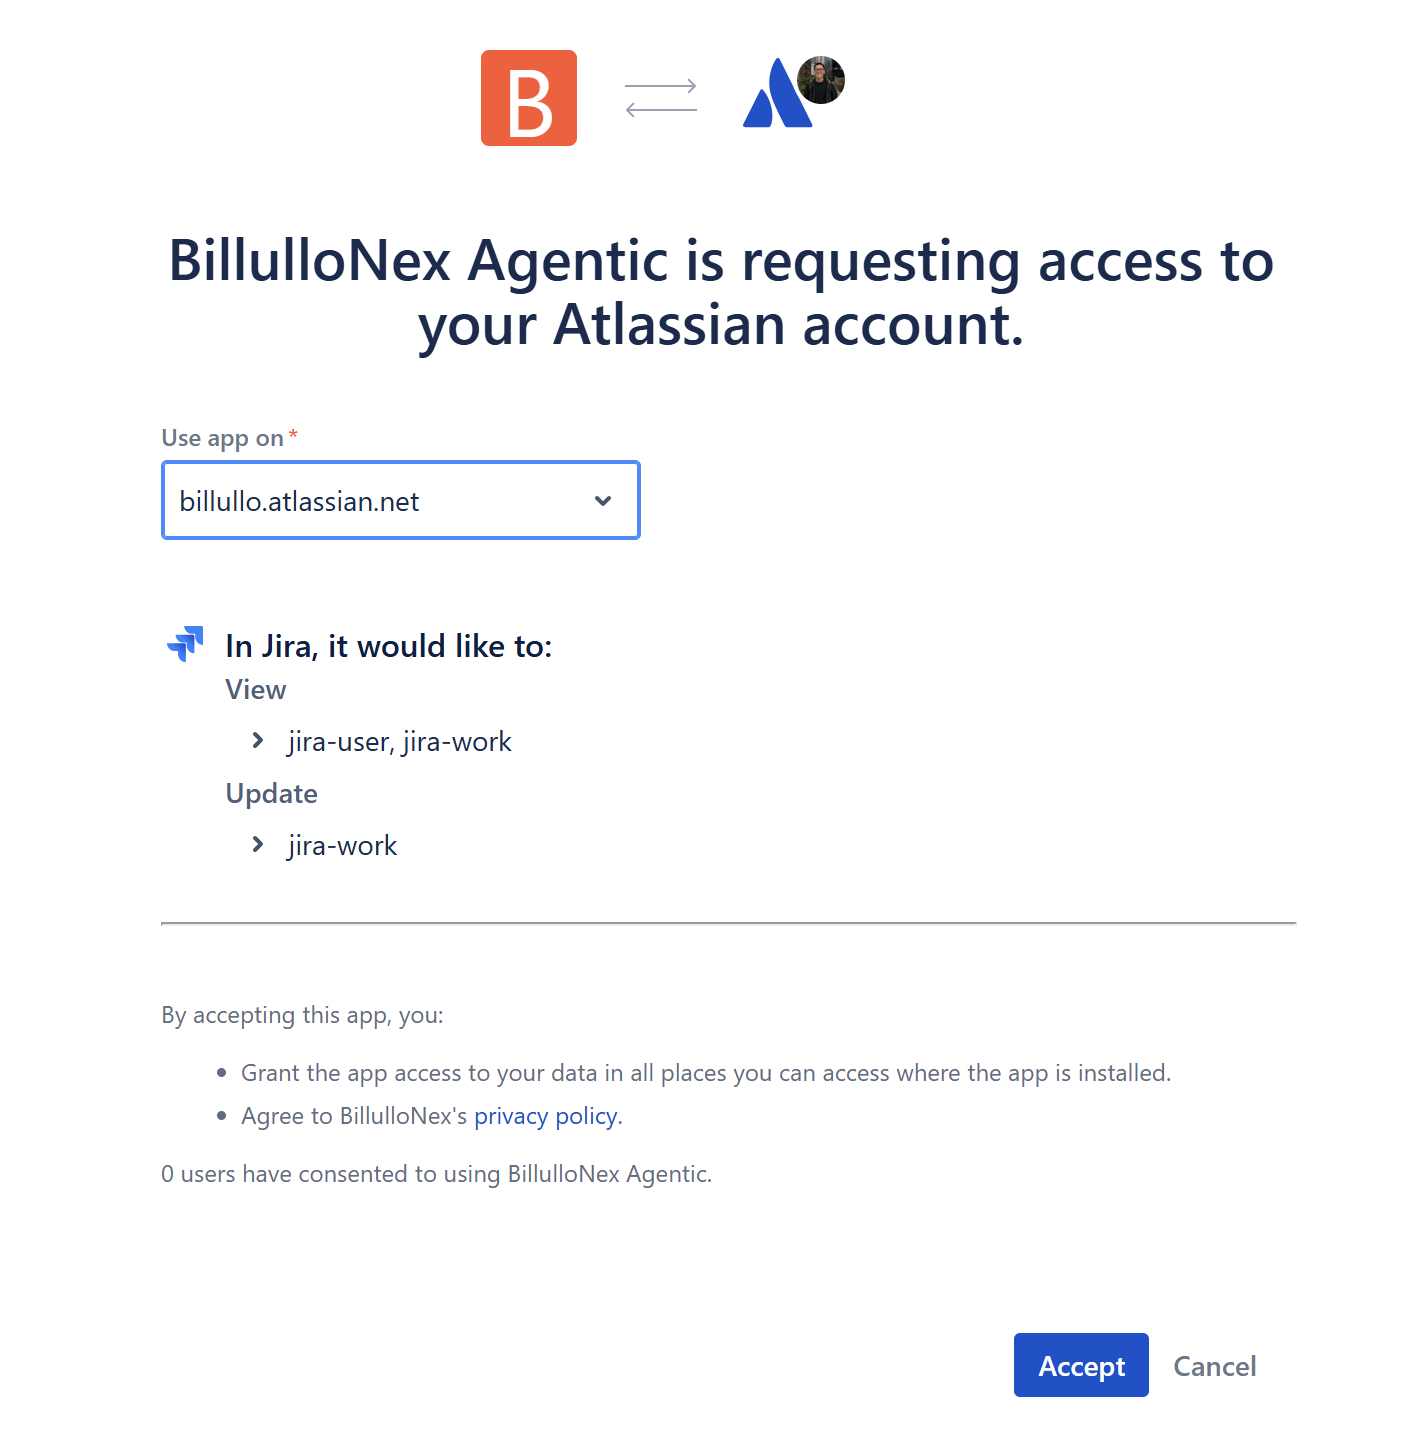
Step 4: Authorize Application
You will be redirected to Atlassian's authorization page. Select the specific Jira site you wish to connect and click "Accept" to grant BillulloNex the necessary permissions.
Step 5: Connection Success
Once redirected back, the Jira card should now display a "Connected" status, indicating the integration is active.
Usage Guide
You can now interact with your Jira projects using natural language commands.
Issue Management
Retrieve and manage issues across your projects:
- "What are the high priority bugs in the Checkout project?"
- "Show me tickets assigned to me."
- "Create a bug ticket for 'Cart API failing on validation' in project WEB."
- "Update ticket WEB-123 status to In Progress."
Project Insights
Get quick summaries and project health checks:
- "Summarize the latest comments on ticket WEB-123."
- "What issues are blocking the current sprint?"
Uninstallation
To disconnect the integration, go back to the Integrations page, find the Jira card, and click "Disconnect". This will immediately revoke the system's access to your Jira data.